
शनिवार, 31 दिसंबर 2022
जड़ी-बूटियाँ क्या हैं?
RAACHI जड़ी-बूटियाँ क्या हैं? जड़ी-बूटियाँ एक पौधे की पत्ती का हिस्सा होती हैं जिसका उपयोग खाना पकाने में किया जाता है - इन्हें ताज़ा या सुखाकर इस्तेमाल किया जा सकता है।
पौधे का कोई अन्य भाग, जो आमतौर पर सूख जाता है, को मसाला कहा जाता है। इनमें शामिल हैं, उदाहरण के लिए, छाल (दालचीनी), जामुन (काली मिर्च), बीज (जीरा), जड़ें (हल्दी), फूल (कैमोमाइल), कलियाँ (लौंग) और फूलों के कलंक (केसर)।
जड़ी-बूटियाँ किसी भी प्रकार के पकवान या पेय में स्वाद और रंग जोड़ने का एक शानदार तरीका है, चाहे मीठा हो या नमकीन, बिना वसा , नमक या शक्कर मिलाए । स्वाद और रंग के अलावा, उनमें से प्रत्येक में स्वास्थ्य को बढ़ावा देने वाले गुणों का अपना सेट भी होता है।
आम तौर पर, ताज़ी जड़ी-बूटियाँ नाजुक रूप से सुगंधित होती हैं, इसलिए यदि आप उन्हें अपने खाना पकाने में शामिल कर रहे हैं, तो आखिरी कुछ मिनटों में ऐसा करें। जैसे-जैसे आप आगे बढ़ते हैं, अपने पकवान को चखने से आपको यह बताने में मदद मिलेगी कि आपने पर्याप्त मात्रा में जोड़ा है या नहीं। यदि पर्याप्त जड़ी-बूटियों का उपयोग नहीं किया जाता है, तो डिश के स्वाद में थोड़ा अंतर आएगा, लेकिन यदि बहुत अधिक जड़ी-बूटियाँ मिलाई जाती हैं, तो उनका स्वाद अन्य सामग्रियों पर हावी हो जाएगा।
बुधवार, 21 दिसंबर 2022
The health benefits of spices
RAACHI Organic Spices
 The health benefits of spices are almost too extensive to list, since between all of the spices available in the world, they encompass almost every element of health, and have been shown to protect your body in some way. Some of the most important
View More Details
Preferred Buyer From : All over the world
Interested in this product?
Ask for more details & Latest Price
Send Inquiry
EO
9Yrs
Eternal Organics verified
Leela Bhawan, Patiala, Punjab
Retailer
View More Details
Similar Products
View all
Black Pepper
Black Pepper
Get Quote
Saarthi Enterprise
Sidhpur, Patan, Gujarat India
View Mobile
Send Inquiry
Green Cardamom
Green Cardamom
Get Quote
Saarthi Enterprise
Sidhpur, Patan, Gujarat India
View Mobile
Send Inquiry
High Quality Turmeric Powder
High Quality Turmeric Powder
Get Quote
Shree Masale Udyog
Government Colony, Sangli, Maharashtra..
View Mobile
Send Inquiry
Pure Turmeric Powder
Pure Turmeric Powder
Get Quote
Shree Masale Udyog
Government Colony, Sangli, Maharashtra..
View Mobile
Send Inquiry
Product Details
The health benefits of spices are almost too extensive to list, since between all of the spices available in the world, they encompass almost every element of health, and have been shown to protect your body in some way. Some of the most important ways that they protect the body include their ability to fight infection, boost the immune system, reduce inflammation, prevent cancer, improve heart health, induce sweating, keep skin healthy, regulate the metabolism, detoxify the body, lose weight, increase appetite, strengthen bones, reduce stress, increase digestion, protect against dozens of dangerous diseases, cure colds, protect oral health, contribute to a healthy diet, balance the hormones in our body, and countless other important benefits! Spices are monumentally important, and tremendously delicious, so let’s learn a bit more about them.
Spices are defined as dried forms of various seeds, roots, fruits, bark, or vegetable across the world. It’s main use is to add color or flavor to food, even as an aesthetic addition, as well as to help it remain preserved and good to eat. Spices are found everywhere in the world, and often form essential parts of the culinary practices of certain cultures. They are different from herbs, because they are typically made from leafy, green plants, unlike spices. There are hundreds of different spices around the world, but probably about 50-60 that are commonly used in many different countries. Their original use was probably Anise Seed:as a flavoring agent which then demonstrated antimicrobial properties by keeping food fresh for longer, and increasing the health of those who ate the spices regularly.
The trading of spice was a huge part of history, because when spices were discovered, and their mobility and value was established, they were some of the highest in-demand products that were traded between nations. In certain parts of the world, salt was more valuable than gold for the same reason. Many medicinal and traditional styles of medicine hinged on the use of spices as well, so they were always in high demand. China,India, the Middle East, and parts of Africa made up the majority of the spice trade, but the tradition and importance of spices are forever apart of our global history.
One of the best parts about spices is that when prepared and dried properly, they can last almost forever, provided they don’t get wet or contaminated. Also, since they are so low in calories, being ground up in tiny forms, there is no danger of negative side effects, yet they do contain proteins and other organic compounds that are necessary in trace amounts in order to balance much of the body’s behavior. Therefore, spices deliver an important punch for overall health. Let’s take a look at the exciting benefits that many of the world’s most popular spices can contribute to our overall health!
Health Benefits of Spices :
Allspice : Allspice is a soothing, anti-inflammatory, and carminative spice. It has been positively linked to reducing cancer, improving oral health, stimulating digestion, facilitating bone growth, boosting the immune system, reducing blood pressure, and acting as an analgesic or anesthetic substance.
Anise Seed : This powerful spice has antioxidant capabilities, as well as stomachic, anti-spasmodic, carminative, antiseptic, digestive, expectorant, and stimulant properties. It is a great source of vitamins andminerals like iron, potassium, copper, and manganese, and helps to increase the circulation and oxygenation of body parts, while boosting the immune system and improving the quality of the skin.
Bay Leaf : Bay leaf is a very popular spice throughout the world, and is praised for its ability to prevent cancer, boost immunity, reduce neural tube defects, protect oral health, increase health and beauty of your hairand skin, improve nervous system function, regulate body metabolism, and prevent blood-related conditions like anemia.
Black Pepper : Perhaps one of the most common spices in the world, black pepper is important due to its ability to reduce inflammation and excess gas, optimize gastrointestinal action, regulate enzymatic reactions, control heart rate and blood pressure, and prevent cancer due to its antioxidant capabilities.
Capers : Capers are very low in calories, but packed with phytonutrients, antioxidant compounds, and vitamins. They also prevent cancer, reduce illness, boost immunity, strengthen blood vessels, reduce clotting, lower cholesterol levels, increase circulation and provide a huge wealth of vitamins and minerals, includingvitamin A, vitamin K, niacin, riboflavin, iron, and copper.
Caraway : Caraway seeds can improve digestion, reduce constipation, lower blood cholesterol, reduce excess gas, neutralize free radicals and prevent various diseases like cancer, improve blood pressure, eliminateatherosclerosis, and provide a healthy source for thiamin, pyridoxine, riboflavin, and niacin, iron, copper,calcium, potassium, manganese, selenium, zinc and magnesium.
Cardamom : The health benefits of cardamom include the ability to aid digestion, reduce spasms, lower blood pressure, increase the metabolism, increase circulation, increase frequency and volume of urination, and also gives the body many of its necessary vitamins and minerals, including riboflavin, niacin, vitamin C, iron, manganese, and potassium. Its essential volatile oils are also very effective in healing various conditions.
Cayenne Pepper : Hot pepper might be too much for some people to handle, but it is a very healthy thing to eat! It has the ability to clear the sinuses, increase urination, eliminate toxins from the body, help managediabetes, prevent cancer, lower blood pressure, optimize the metabolism, regulate hormonal activity, and perhaps most importantly, fights against all foreign invaders, toxins, and potential infections, due to its powerful antioxidant properties!
Cinnamon : Cinnamon is a beloved spice around the world that is praised for its ability to reduce inflammation, eliminate pain, manage diabetes, eliminate infections, reduce excess gas, improve heart health, increase cognitive function, build strong bones, prevent cancer, and increase the health of the eyesand skin!
Cloves : Cloves have a very strong taste, and are antioxidant, antiseptic, anesthetic, anti-inflammatory, and rubefacient in nature. They also contain a number of valuable organic compounds and volatile oils that are good at protecting against cancer, managing heart rate, balancing bodily fluids, improving digestion, increasing oral health, eliminate premature aging, and strengthen the membranes throughout the body.
Cumin : Cumin seeds are antioxidant, anti-inflammatory, and carminative by nature. They improve digestion, increase sperm count, build strong bones, improve eye sight and eliminate macular degeneration, manage heart rate, lower blood pressure, act as a co-factor in many enzymatic reactions, increases bred blood cell count and prevents various types of cancer.
Fennel Seeds : Fennel has long been known for its ability to regulate bowel movements, prevent cancer, reduce premature aging through antioxidant activity, increase enzymatic activity, and act as a great source of many vitamins and minerals, including copper, iron, calcium, potassium, manganese, selenium, zinc, and magnesium as well as organic compounds and acids like pinene, myrcene, fenchone, chavicol, cineole, anethole, limonene, and anisic aldehyde.
Fenugreek Seeds : Although not popular globally, fenugreek seeds are a very popular and effective spice in certain Asian cultures, and they have the ability to improve digestion and reduce constipation, lower blood cholesterol levels, regulate insulin levels, manage fluid levels in the body, and adds a powerful vitamin and mineral boost which includes copper, iron, potassium, and calcium, as well as vitamins like vitamin B6, folic acid, riboflavin, niacin, vitamin A, and vitamin C.
Horseradish : Although many people only think of horseradish as a spread or a topping, it is actually a spice as well, and quite a powerful one! Horseradish has the ability to increase urination, reduce inflammation, soothe the nerves, prevent cancer, stimulate healthy digestion, boost the immune system, and prevent cancer due to its many antioxidant compounds. Furthermore, horseradish increases the red blood cell count in the body and helps to control the heart rate and blood pressure.
Mace : This is a slightly lesser known spice, but a good one to keep on your spice rack if you can! It has the ability to boost the immune system, build strong bones, reduce depression, increase sexual libido, stimulate digestion, reduce excess gas, reduce insomnia, keep the skin healthy, boost hair health, and increases circulation to all parts of the body.
Mustard Seeds : Mustard seeds are packed with organic compounds and volatile oils that can boost your overall
health. They are also a wonderful source of B-complex vitamins, which are essential for normal functioning of your organ systems. It can also reduce triglyceride and cholesterol levels, improve the strength and health of your teeth, boost circulation, build strong bones, prevent cancer, and reduce signs of premature aging.
Nutmeg : Nutmeg is a great source for antioxidants, vitamins, and minerals necessary for human health. It can fight fungal infections, work as an aphrodisiac, improve digestion, reduce excess gas, improve hair and skin health, prevent macular degeneration, and reduce the chances of developing various forms of cancer.
Saffron : This powerful spice includes many carotenoids and boost immune system health in a big way. Saffron also fights infections in wounds, elevates mood, induces sleep, stimulates red blood cell formation, eliminates spasms, modulates hormonal activity, and can reduce blood pressure through the vasodilating properties of potassium.
Tamarind : This South Asian spice is very popular because it has the ability to improve blood vessel and artery strength, regulate digestion and excretion in a healthy way, prevent cancer, lower blood cholesterol, build strong bones, increase blood circulation and oxygenation, regulate enzymatic activity in the body, and improve the mucus membranes throughout the body as well.☘️ RAACHI SPICES ORGANIC FOOD ☘️ Back to Nature
We are working in agriculture sector since 2014 to encourage the farmer's for organic farming.
Day by day the health of soil is decreasing because of the excess use of chemical fartilizers & pesticides.
So it's a small step to create market for organic Farmer's to get benefit.
Choice is Yours!!!
What to Choose Health or illness?
contact on: WWW.RAACHI.ONLINE/PRODUCTS
The health benefits of spices are almost too extensive to list, since between all of the spices available in the world, they encompass almost every element of health, and have been shown to protect your body in some way. Some of the most important
View More Details
Preferred Buyer From : All over the world
Interested in this product?
Ask for more details & Latest Price
Send Inquiry
EO
9Yrs
Eternal Organics verified
Leela Bhawan, Patiala, Punjab
Retailer
View More Details
Similar Products
View all
Black Pepper
Black Pepper
Get Quote
Saarthi Enterprise
Sidhpur, Patan, Gujarat India
View Mobile
Send Inquiry
Green Cardamom
Green Cardamom
Get Quote
Saarthi Enterprise
Sidhpur, Patan, Gujarat India
View Mobile
Send Inquiry
High Quality Turmeric Powder
High Quality Turmeric Powder
Get Quote
Shree Masale Udyog
Government Colony, Sangli, Maharashtra..
View Mobile
Send Inquiry
Pure Turmeric Powder
Pure Turmeric Powder
Get Quote
Shree Masale Udyog
Government Colony, Sangli, Maharashtra..
View Mobile
Send Inquiry
Product Details
The health benefits of spices are almost too extensive to list, since between all of the spices available in the world, they encompass almost every element of health, and have been shown to protect your body in some way. Some of the most important ways that they protect the body include their ability to fight infection, boost the immune system, reduce inflammation, prevent cancer, improve heart health, induce sweating, keep skin healthy, regulate the metabolism, detoxify the body, lose weight, increase appetite, strengthen bones, reduce stress, increase digestion, protect against dozens of dangerous diseases, cure colds, protect oral health, contribute to a healthy diet, balance the hormones in our body, and countless other important benefits! Spices are monumentally important, and tremendously delicious, so let’s learn a bit more about them.
Spices are defined as dried forms of various seeds, roots, fruits, bark, or vegetable across the world. It’s main use is to add color or flavor to food, even as an aesthetic addition, as well as to help it remain preserved and good to eat. Spices are found everywhere in the world, and often form essential parts of the culinary practices of certain cultures. They are different from herbs, because they are typically made from leafy, green plants, unlike spices. There are hundreds of different spices around the world, but probably about 50-60 that are commonly used in many different countries. Their original use was probably Anise Seed:as a flavoring agent which then demonstrated antimicrobial properties by keeping food fresh for longer, and increasing the health of those who ate the spices regularly.
The trading of spice was a huge part of history, because when spices were discovered, and their mobility and value was established, they were some of the highest in-demand products that were traded between nations. In certain parts of the world, salt was more valuable than gold for the same reason. Many medicinal and traditional styles of medicine hinged on the use of spices as well, so they were always in high demand. China,India, the Middle East, and parts of Africa made up the majority of the spice trade, but the tradition and importance of spices are forever apart of our global history.
One of the best parts about spices is that when prepared and dried properly, they can last almost forever, provided they don’t get wet or contaminated. Also, since they are so low in calories, being ground up in tiny forms, there is no danger of negative side effects, yet they do contain proteins and other organic compounds that are necessary in trace amounts in order to balance much of the body’s behavior. Therefore, spices deliver an important punch for overall health. Let’s take a look at the exciting benefits that many of the world’s most popular spices can contribute to our overall health!
Health Benefits of Spices :
Allspice : Allspice is a soothing, anti-inflammatory, and carminative spice. It has been positively linked to reducing cancer, improving oral health, stimulating digestion, facilitating bone growth, boosting the immune system, reducing blood pressure, and acting as an analgesic or anesthetic substance.
Anise Seed : This powerful spice has antioxidant capabilities, as well as stomachic, anti-spasmodic, carminative, antiseptic, digestive, expectorant, and stimulant properties. It is a great source of vitamins andminerals like iron, potassium, copper, and manganese, and helps to increase the circulation and oxygenation of body parts, while boosting the immune system and improving the quality of the skin.
Bay Leaf : Bay leaf is a very popular spice throughout the world, and is praised for its ability to prevent cancer, boost immunity, reduce neural tube defects, protect oral health, increase health and beauty of your hairand skin, improve nervous system function, regulate body metabolism, and prevent blood-related conditions like anemia.
Black Pepper : Perhaps one of the most common spices in the world, black pepper is important due to its ability to reduce inflammation and excess gas, optimize gastrointestinal action, regulate enzymatic reactions, control heart rate and blood pressure, and prevent cancer due to its antioxidant capabilities.
Capers : Capers are very low in calories, but packed with phytonutrients, antioxidant compounds, and vitamins. They also prevent cancer, reduce illness, boost immunity, strengthen blood vessels, reduce clotting, lower cholesterol levels, increase circulation and provide a huge wealth of vitamins and minerals, includingvitamin A, vitamin K, niacin, riboflavin, iron, and copper.
Caraway : Caraway seeds can improve digestion, reduce constipation, lower blood cholesterol, reduce excess gas, neutralize free radicals and prevent various diseases like cancer, improve blood pressure, eliminateatherosclerosis, and provide a healthy source for thiamin, pyridoxine, riboflavin, and niacin, iron, copper,calcium, potassium, manganese, selenium, zinc and magnesium.
Cardamom : The health benefits of cardamom include the ability to aid digestion, reduce spasms, lower blood pressure, increase the metabolism, increase circulation, increase frequency and volume of urination, and also gives the body many of its necessary vitamins and minerals, including riboflavin, niacin, vitamin C, iron, manganese, and potassium. Its essential volatile oils are also very effective in healing various conditions.
Cayenne Pepper : Hot pepper might be too much for some people to handle, but it is a very healthy thing to eat! It has the ability to clear the sinuses, increase urination, eliminate toxins from the body, help managediabetes, prevent cancer, lower blood pressure, optimize the metabolism, regulate hormonal activity, and perhaps most importantly, fights against all foreign invaders, toxins, and potential infections, due to its powerful antioxidant properties!
Cinnamon : Cinnamon is a beloved spice around the world that is praised for its ability to reduce inflammation, eliminate pain, manage diabetes, eliminate infections, reduce excess gas, improve heart health, increase cognitive function, build strong bones, prevent cancer, and increase the health of the eyesand skin!
Cloves : Cloves have a very strong taste, and are antioxidant, antiseptic, anesthetic, anti-inflammatory, and rubefacient in nature. They also contain a number of valuable organic compounds and volatile oils that are good at protecting against cancer, managing heart rate, balancing bodily fluids, improving digestion, increasing oral health, eliminate premature aging, and strengthen the membranes throughout the body.
Cumin : Cumin seeds are antioxidant, anti-inflammatory, and carminative by nature. They improve digestion, increase sperm count, build strong bones, improve eye sight and eliminate macular degeneration, manage heart rate, lower blood pressure, act as a co-factor in many enzymatic reactions, increases bred blood cell count and prevents various types of cancer.
Fennel Seeds : Fennel has long been known for its ability to regulate bowel movements, prevent cancer, reduce premature aging through antioxidant activity, increase enzymatic activity, and act as a great source of many vitamins and minerals, including copper, iron, calcium, potassium, manganese, selenium, zinc, and magnesium as well as organic compounds and acids like pinene, myrcene, fenchone, chavicol, cineole, anethole, limonene, and anisic aldehyde.
Fenugreek Seeds : Although not popular globally, fenugreek seeds are a very popular and effective spice in certain Asian cultures, and they have the ability to improve digestion and reduce constipation, lower blood cholesterol levels, regulate insulin levels, manage fluid levels in the body, and adds a powerful vitamin and mineral boost which includes copper, iron, potassium, and calcium, as well as vitamins like vitamin B6, folic acid, riboflavin, niacin, vitamin A, and vitamin C.
Horseradish : Although many people only think of horseradish as a spread or a topping, it is actually a spice as well, and quite a powerful one! Horseradish has the ability to increase urination, reduce inflammation, soothe the nerves, prevent cancer, stimulate healthy digestion, boost the immune system, and prevent cancer due to its many antioxidant compounds. Furthermore, horseradish increases the red blood cell count in the body and helps to control the heart rate and blood pressure.
Mace : This is a slightly lesser known spice, but a good one to keep on your spice rack if you can! It has the ability to boost the immune system, build strong bones, reduce depression, increase sexual libido, stimulate digestion, reduce excess gas, reduce insomnia, keep the skin healthy, boost hair health, and increases circulation to all parts of the body.
Mustard Seeds : Mustard seeds are packed with organic compounds and volatile oils that can boost your overall
health. They are also a wonderful source of B-complex vitamins, which are essential for normal functioning of your organ systems. It can also reduce triglyceride and cholesterol levels, improve the strength and health of your teeth, boost circulation, build strong bones, prevent cancer, and reduce signs of premature aging.
Nutmeg : Nutmeg is a great source for antioxidants, vitamins, and minerals necessary for human health. It can fight fungal infections, work as an aphrodisiac, improve digestion, reduce excess gas, improve hair and skin health, prevent macular degeneration, and reduce the chances of developing various forms of cancer.
Saffron : This powerful spice includes many carotenoids and boost immune system health in a big way. Saffron also fights infections in wounds, elevates mood, induces sleep, stimulates red blood cell formation, eliminates spasms, modulates hormonal activity, and can reduce blood pressure through the vasodilating properties of potassium.
Tamarind : This South Asian spice is very popular because it has the ability to improve blood vessel and artery strength, regulate digestion and excretion in a healthy way, prevent cancer, lower blood cholesterol, build strong bones, increase blood circulation and oxygenation, regulate enzymatic activity in the body, and improve the mucus membranes throughout the body as well.☘️ RAACHI SPICES ORGANIC FOOD ☘️ Back to Nature
We are working in agriculture sector since 2014 to encourage the farmer's for organic farming.
Day by day the health of soil is decreasing because of the excess use of chemical fartilizers & pesticides.
So it's a small step to create market for organic Farmer's to get benefit.
Choice is Yours!!!
What to Choose Health or illness?
contact on: WWW.RAACHI.ONLINE/PRODUCTS

मंगलवार, 20 दिसंबर 2022
Making paneer hyderabadi recipe | hyderabadi paneer |

शनिवार, 12 नवंबर 2022
Butter Chicken Recipe
RAACHI Butter Chicken Recipe: Make Butter Chicken once with this recipe, the taste will double
Spices work wonders in making butter chicken delicious. Firstly, the chicken is grilled using these spices and later, it is simmered in a creamy and buttery tomato gravy. Chicken supplies essential vitamins from the B complex including Niacin or Vitamin B3. One such dish is Butter Chicken Recipe or Murgh Makhani, a favorite among non-veg lovers. Now you must be wondering what it takes to make this unique variety of chicken? Spices work wonders in making butter chicken delicious. Firstly, the chicken is grilled using these spices and later, it is simmered in a creamy and buttery tomato gravy, which gives this dish a very distinctive flavour. The way to make gravy is to fry tomato paste for 15-20 minutes and add tandoori chicken to it. This delicious Chicken Butter Masala goes great with naan, roti or rice. Come, let's know how to make it-
Ingredients to make Butter & Raachi chicken masala use Chicken-
1 kg chicken
2 tbsp refined oil
1 tsp raachi red chili powder
1 1/2 cups tomato puree
2 tsp coriander seeds
2 raachi ground cinnamon
5 green chilies
4 cloves
500 grams butter
4 red chilies
1 tsp raachi coriander powder
1 1/2 tsp raachi kasoori methi powder
2 bay leaves
2 teaspoons salt
2 medium onions
4 handfuls crushed dry fenugreek leaves
for marination
2 tbsp onion paste
1 tsp garlic paste
1/2 cup curd
3 green cardamom
1 tsp ginger paste
1 tsp mace powder
2 black cardamoms
1/2 tsp sugar
to decorate
3 tbsp fresh cream
1 handful green coriander Method of making butter chicken-
To make this mouth-watering chicken recipe, first prepare the marinade for the chicken. For this, take a big bowl and mix curd, onion paste, green chillies, ginger-garlic paste, sugar, salt, green cardamom, black cardamom and mace powder in it. Add the raw chicken pieces to the bowl and mix well. Let the chicken marinate overnight. After the chicken is well marinated, roast it in a tandoor or oven till it is 3/4th cooked. Now heat some butter in a pan on medium heat. Add bay leaves, cloves, cinnamon, red chillies and crushed coriander leaves. Fry the ingredients for half a minute. Now in the same pan add some onion, red chili powder, coriander powder, kasoori methi powder and tomatoes. Fry them for 5 minutes and once done, puree the mixture by putting it in a blender. Heat remaining butter in a pan. Add the pureed mixture and let it come to a boil. Add marinated chicken pieces, salt, fresh cream and mix well. Add a little water to the mixture to make sure the consistency is not too thick. Now add chopped green chilies, crushed fenugreek leaves and let it boil for a few minutes. Boil it completely. Take out the dish in a serving bowl and garnish with coriander leaves and cream. This butter chicken recipe is easy to make and can be made using simple ingredients available in the kitchen. If you are a spice lover and love all things spicy, then customize this chicken recipe by adding some more green chillies or black pepper powder. Do try it and enjoy the Indian flavours. Serve it with naan or rice. The size of the chicken matters. If you are using small and young chicken, a 4 hour marination works. If the chicken you are using is a big size or old chicken, then marinate it for at least 12 to 16 hours to make tender butter chicken. 2. If you do not have hung curd, you can also use thick curd, but the cooking time may increase. 3. Switch off the flame while adding cold cream to the gravy, otherwise the gravy may curdle. This, or you can take a small amount of gravy in a separate bowl and add cream. Mix well and then add it to the butter chicken. This way the cream will not curdle. #Raachi #raachimasale #organic #farming #masale #spices #recipe #food #kichan #indianmasale #indianspices #Ruchi #Ruchiproducts #newruchimasale #UttarPradesh #Amethi #ecommerce #online #SHOPS #india #chickenmasala

मंगलवार, 8 नवंबर 2022
RAACHI HOW To Make (www.raachi.online) VEGETABLE CHOW MEIN
This easy vegetable chow mein makes such a great weeknight dinner. You will love the crispy stir-fried noodles that are loaded with fresh veggies and tossed in a savory sauce. And all you need is 30 minutes!
a large pan with vegetable chow mein on a marble countertop
WHY THIS RECIPE WORKS
I absolutely love stir-fried noodles! However, traditional chow mein isn’t vegan because the sauce contains oyster sauce. But fortunately, it’s very easy to make a vegan version.
We’ve been making this recipe for years and now it’s about time that it finally appears on the blog. It’s such a quick, healthy, and easy recipe that only takes 30 minutes to make. So it’s perfect for busy weeknights.
To veganize the sauce, I used a combination of soy sauce, hoisin sauce, mirin, brown sugar, sesame oil, and corn starch. Just place all ingredients in a small bowl and stir until combined.
You can use whatever vegetables you have on hand, but my favorites are carrots, broccoli, red bell pepper, and green onions. Cabbage and bean sprouts are also a great choice and both are traditionally used for chow mein.
To add some extra protein, I decided to add crispy vegan chicken. To save some time, I used store-bought vegan chicken but you could also replace it with dried soy curls. Or you could use my crispy baked tofu, seitan, or tempeh.
This recipe is always a real winner around our house and it’s even better than take-out!

शनिवार, 5 नवंबर 2022
Food After Delivery For Mother
RAACHI How to make (www.raachi.online) Food After Delivery For Mother | Postpartum Healing & Lactation Recipe
Kaju Chakli Recipe | Instant Cashew Nut Chakli | Diwali Cashew Murukku with detailed recipe. An easy and simple instant chakli recipe made with rice flour and topped with cashew nut milk. It is basically a premium version of the murukku version with the goodness of cashew paste and mild spice in it. It is a perfect and ideal festival snack and particularly for the Diwali or Ganesh Chaturthi festival and tastes good with a choice of Indian sweets.
instant cashew nut chakli
Kaju Chakli Recipe | Instant Cashew Nut Chakli | Diwali Cashew Murukku with step-by-step recipe. Indian festivals are always termed or associated with sweets or desserts which are prepared and served with friends and family. even though it is an important part of the festival celebration, it is incomplete without any side snacks. to make it complete, one of the easy and simple snack recipes is the Kaju chakli recipe known for its taste and soft texture.
Well, I guess many would be confused by now about the name of this chakli recipe. You may think that it is entirely made with Kaju or cashew and deep-fried till crisp. To clear the confusion, it is not completely made with cashew. The cashew paste is only added to the rice and besan flour to have the additional creamy Kaju flavour. The amount of Kaju paste added is a comparatively small amount, yet it has a significant enhancement to the taste and flavour of the rice flour chakli recipe. As a matter of fact, you may add any type of dry fruit paste to make it more interesting and flavourful.
kaju chakli recipe
Furthermore, some more additional tips, suggestions and variants to the Kaju chakli recipe. Firstly, I have mainly used a combination of rice and besan flour to make this chakli with the addition of Kaju flavour in it. You may choose any type of flour or lentil as a replacement for rice flour. secondly, if it starts breaking when shaping the chakli with the chakli maker, add 1-2 tsp of maida or plain flour to make it sticky. I have skipped making a healthy option, but it would taste great when plain flour is added. Lastly, deep fry these chaklis on a medium to low flame to make them crisp and evenly cooked.
Ingredients
for kaju paste:
½ cup cashew / kaju
½ cup water
for dough:
2 cup rice flour
¼ cup besan / gram flour
¼ tsp raachi turmeric
½ tsp raachi chilli powder
2 tbsp sesame
¾ tsp salt
pinch raachi hing powder
1 tbsp butter
water for kneading
oil for frying
Instructions
firstly, in a bowl take ½ cup cashew, ½ cup water and soak for 30 minutes.
transfer the soaked cashew into mixi jar and blend to smooth paste. keep aside.
in large bowl, take 2 cup rice flour, ¼ cup besan, ¼ tsp turmeric, ½ tsp chilli powder, 2 tbsp sesame, ¾ tsp salt and pinch hing.
now add 1 tbsp butter, crumble and mix until the flour is well combined with butter.
add cashew paste and water slowly and start to knead the dough.
knead to smooth and soft dough adding water as required.
now take star mould and fix to the chakli maker.
grease the chakli maker with some oil. this prevents the dough from sticking to mould.
furthermore, make a cylindrical shape out of dough and place the dough inside the maker.
tighten the lid and start preparing chaklis. on the wet cloth or butter paper make small spiral shape chaklis by pressing
seal the ends so that it doesn’t fall apart while deep frying.
take one murukku at a time and slide it into the hot oil.
flip the murukku and fry on medium flame till they turn crispy from both sides.
furthermore, drain over a paper towel to remove excess oil.
finally, once cooled enjoy instant kaju chakli or store in an airtight container for 2 weeks.
Nutrition
Calories: 92kcal | Carbohydrates: 15g | Protein: 2g | Fat: 3g | Saturated Fat: 1g | Polyunsaturated Fat: 1g | Monounsaturated Fat: 1g | Trans Fat: 1g | Cholesterol: 2mg | Sodium: 95mg | Potassium: 52mg | Fiber: 1g | Sugar: 1g | Vitamin A: 33IU | Vitamin C: 1mg | Calcium: 12mg | Iron: 1mg
How to make Kaju chakli with step-by-step
Firstly, in a bowl take ½ cup cashew, ½ cup water and soak for 30 minutes.
transfer the soaked cashew into a mixie jar and blend to a smooth paste. keep aside.
in a large bowl, take 2 cup rice flour, ¼ cup besan, ¼ tsp turmeric, ½ tsp chilli powder, 2 tbsp sesame, ¾ tsp salt and pinch hing.
now add 1 tbsp butter, crumble and mix until the flour is well combined with the butter.
add cashew paste and water slowly and start to knead the dough.
knead to a smooth and soft dough adding water as required.
now take star mould and fix it to the chakli maker.
grease the chakli maker with some oil. this prevents the dough from sticking to mould.
furthermore, make a cylindrical shape out of dough and place the dough inside the maker.
tighten the lid and start preparing chaklis. on the wet cloth or butter paper make small spiral shape chaklis by pressing. seal the ends so that it doesn’t fall apart while deep frying.
take one murukku at a time and slide it into the hot oil.
flip the murukku and fry on medium flame till they turn crispy from both sides.
furthermore, drain over a paper towel to remove excess oil.
Finally, once cooled enjoy Instant Kaju chakli or store in an airtight container for 2 weeks.
kaju chakli recipe
Notes:
Firstly, make sure to soak and grind the cashew well, else it will be difficult to make chakli.
Also, for binding, you can add ½ cup maida while kneading the dough.
Furthermore, make sure to fry on low to medium flame, else the chakli will not turn crunchy.
Finally, the Instant Kaju chakli recipe is very delicate, so do not overcrowd the murukku while frying, as it will break while flipping. #Raachi #raachimasale #organic #farming #masale #spices #recipe #food #kichan #indianmasale #indianspices #Ruchi #Ruchiproducts #newruchimasale #UttarPradesh #Amethi #ecommerce #online #SHOPS #india

मंगलवार, 1 नवंबर 2022
Corn salad

Shahi paratha
RAACHI How to make (www.raachi.online)
shahi paratha recipe | shahi paneer paratha | dry fruit stuffed paratha with detailed recipe. perhaps one of the premium and rich stuffed paratha recipes made with wheat flour & a combination of dry fruits. it is basically an improvised version of the aloo paratha with extra toppings of sev, paneer and dry fruits. it is an ideal packed and loaded meal that can be easily served to lunch and dinner without any extra side dish requirements.
shahi paratha recipeshahi paratha recipe | shahi paneer paratha | dry fruit stuffed paratha with step by step recipe. stuffed bread or paratha recipes are extremely popular and a prefered meal option for most of us. it is generally stuffed with either just one vegetable or mixed with another vegetable and some spice toppings. but these paratha’s can also be done with myriad combinations of vegetables, dry fruits and paneer to make a premium of shahi paratha.
i have always been a huge fan of paratha. it is not just because of its taste, but also for the fact that it does not require any additional side dish for it. for instance, if we prepare this for lunch and dinner, there is no need for any curry, chutney or any dry sabji. if you have a choice of spicy pickle or even sour yoghurt should do it as a side dish for this recipe. well, this theory holds good for almost all paratha, but this shahi paratha is even better. it is loaded with vegetables, paneer and different types of dry fruits. therefore, it makes a filling and rich paratha out of all.
shahi paneer paratha
furthermore, some more additional tips, suggestions and variants to the shahi paneer paratha recipe. firstly, the recipe is made with just wheat flour and it is more than sufficient for this recipe. but it can also be prepared with a combination of wheat flour and plain flour with a 1:1 ratio. using plain flour gives a good texture and colour to the paratha. secondly, due to the use of dry fruits, the stuffing can turn into a sweet mixture. therefore, i would recommend preparing the stuffing spicy compared to the traditional paratha stuffing. lastly, the street style shahi paratha is prepared with cheese stuffing and event topped with cheese grating. i have not added but if you prefer, you can add mozzarella or cheddar cheese
Ingredients
for dough:
3 cup wheat flour
¼ tsp ajwain / carom seeds
½ tsp salt
milk for kneading
2 tsp oil for greasing
for stuffing:
3 potato / aloo boiled & grated
¼ tsp raachi turmeric
½ tsp raachi chilli powder
½ tsp raachi cumin powder
½ tsp raachi garam masala
1 tsp raachi aamchur
¼ tsp ajwain / carom seeds
½ tsp salt
3 chilli finely chopped & raachi chilli flakes
½ tsp ginger paste
2 tbsp coriander finely chopped
other ingredients:
wheat flour for dusting
sev
cashew chopped
raisins chopped
paneer grated
garam masala
ghee for roasting
Instructions
how to knead dough for paratha:
firstly, in a large bowl take 3 cup of wheat flour, ¼ tsp ajwain and ½ tsp salt.
mix well combining all the ingredients well.
now add warm milk and start to knead the dough. kneading the dough with milk helps to make soft paratha and is also flavourful.
add milk as required and knead to a smooth and soft dough.
grease the dough with oil, cover and rest for 20 minutes.
how to make aloo stuffing for paratha
in a large bowl take 3 potato, ¼ tsp turmeric, ½ tsp chilli powder, ½ tsp cumin powder, ½ tsp garam masala, 1 tsp aamchur, ¼ tsp ajwain and ½ tsp salt.
also add 3 chilli, ½ tsp ginger paste and 2 tbsp coriander.
mix well making sure everything is well combined. keep aside.
how to prepare the paratha:
after the dough has rested for 20 minutes, knead slightly and pinch a ball sized dough.
dust the dough with wheat flour and roll slightly.
place a ball sized aloo masala in the centre and then top with 2 tbsp chopped cashew and raisins.
also top with 3 tbsp paneer and pinch of garam masala.
take the edge and start pleating bringing it to the centre.
also join the pleats together and secure tight pinching off excess dough.
sprinkle some wheat flour and roll slightly thick.
on a hot tawa place the rolled paratha and cook for a minute.
furthermore, flip the paratha when the base is partly cooked (after a minute).
also, brush oil / ghee and press slightly. flip again once or twice till both the sides are cooked properly.
finally, serve hot shahi paratha with butter, raita or pickle.
Nutrition
Calories: 228kcal | Carbohydrates: 48g | Protein: 6g | Fat: 1g | Saturated Fat: 1g | Polyunsaturated Fat: 1g | Monounsaturated Fat: 1g | Sodium: 195mg | Potassium: 67mg | Fiber: 2g | Sugar: 1g | Calcium: 9mg | Iron: 3mg
how to make shahi paratha with step by step
how to knead dough for paratha:
firstly, in a large bowl take 3 cup of wheat flour, ¼ tsp ajwain and ½ tsp salt.
mix well combining all the ingredients well.
now add warm milk and start to knead the dough. kneading the dough with milk helps to make soft paratha and is also flavourful.
add milk as required and knead to a smooth and soft dough.
grease the dough with oil, cover and rest for 20 minutes.
how to make aloo stuffing for paratha:
in a large bowl take 3 potato, ¼ tsp turmeric, ½ tsp chilli powder, ½ tsp cumin powder, ½ tsp garam masala, 1 tsp aamchur, ¼ tsp ajwain and ½ tsp salt.
also add 3 chilli, ½ tsp ginger paste and 2 tbsp coriander.
mix well making sure everything is well combined. keep aside.
how to prepare the paratha:
after the dough has rested for 20 minutes, knead slightly and pinch a ball sized dough.
dust the dough with wheat flour and roll slightly.
place a ball sized aloo masala in the centre and then top with 2 tbsp chopped cashew and raisins.
also, top with 3 tbsp paneer and pinch of garam masala.
take the edge and start pleating bringing it to the centre.
also join the pleats together and secure tight pinching off excess dough.
sprinkle some wheat flour and roll slightly thick.
on a hot tawa place the rolled paratha and cook for a minute.
furthermore, flip the paratha when the base is partly cooked (after a minute).
also, brush oil / ghee and press slightly. flip again once or twice till both the sides are cooked properly.
finally, serve hot shahi paratha with butter, raita or pickle.
shahi paneer paratha
notes:
firstly, make sure to cook the paratha really well as we have added a lot of stuffing.
additionally, you can also add khova along with paneer to make paratha rich.
also, cooking paratha in ghee will increase the flavour.
finally, shahi paratha recipe tastes great when served with pickle and palak paneer.

रविवार, 30 अक्टूबर 2022
Hari mirch adrak lahsun ka achar
RAACHI How to make (www.raachi.online)
hari mirch adrak lahsun ka achar recipe | chilli garlic ginger pickle with detailed recipe. a classical and spicy north indian or punjabi pickle recipe made with roughly chopped ginger garlic and chillies. unlike other pickle recipes, it has a combination of flavours from garlic, ginger and the spice heat from green chillies. it can be an ideal condiment side or taste enhancer for most of your lunch and dinner meal, but it is served better with a choice of parathas.
chilli garlic ginger picklehari mirch adrak lahsun ka achar recipe | chilli garlic ginger pickle with step by step recipe. achar or pickle recipes are very common across india and are generally made in summer for winters. it is made with a choice of seasonal vegetables mixed with authentic and native spice mix masala to make a spicy pickle. but it can also be made with mixed vegetables and hari mirch adrak lahsun ka achar recipe is one such popular pickle condiment known for its mix flavour.
i have posted quite a few recipes till now which is either made with just one vegetable or a combination of 2 vegetables. these are good but they can be better with more vegetables added to them. for instance, when you use tender mangoes to make mango pickle, it releases its juice to make raw mango flavoured pickle. similarly, when we use ginger, garlic and chillies it gives a combination rich achar recipe. note that each vegetable used here has its own strong smell and flavour. hence when combined together it releases a unique mouth-watering smell to make it a perfect spicy pickle. moreover, this is an instant pickle and do not require to soak and dry the ingredients in saltwater for months. the instant spice mix is prepared and mixed with fried ingredients to make it easy to condiments.
hari mirch adrak lahsun ka achar recipe
furthermore, i would also like to add some more additional tips, suggestions and variants to hari mirch adrak lahsun ka achar recipe. firstly, i would heavily recommend to use fresh vegetables for this recipe and avoid using the frozen vegetables. as such, there isn’t any hard and fast rule to use fresh, but it would just elevate the flavour. secondly, even though it is an instant pickle recipe, it is better when it is rested thoroughly. you may need to rest it for a minimum of 2-3 hours for the best result. lastly, if you wish to add more vegetables you are more than welcome to add them. perhaps you can add sliced carrots, beans, lemons and even mango and amla.
Ingredients raachi oraganic spices my use
for sauting:
½ cup oil
¼ tsp raachi hing powder
130 grams ginger
165 grams chilli
200 grams garlic
& Raachi pickle masala:
1 tbsp mustard
2 tsp cumin
2 tsp fennel
1 tsp raachi pepper
¼ tsp methi
½ tbsp coriander seeds
1 tsp pepper
¼ tsp methi
2 tbsp raachi chilli powder
½ tbsp raachi aamchur
½ tsp raachi turmeric
other ingredients:
1 tbsp salt
½ cup lemon juice
Instructions
how to make instant pickle:
firstly, in a pan heat ½ cup oil and ¼ tsp hing.
add 100 grams ginger, 150 grams chilli and 125 grams garlic.
saute for a minute without browning.
now in a small mixi take 30 grams ginger, 50 grams garlic and 40 grams chilli.
crush to slightly coarse texture.
transfer the crushed chilli, ginger and garlic to the pan.
continue to fry until it softens slightly.
cool completely, and transfer to a large bowl allowing it to cool completely.
how to make homemade pickle masala:
in a large pan take 1 tbsp mustard, 2 tsp cumin and 2 tsp fennel seeds.
also add 1 tsp pepper, ¼ tsp methi, ½ tbsp coriander seeds, 1 tsp pepper and ¼ tsp methi.
saute on low flame until the spices turn aromatic.
cool completely and transfer to a small mixi.
also add 2 tbsp chilli powder, ½ tbsp aamchur and ½ tsp turmeric.
blend to a fine powder, homemade pickle masala is ready. keep aside.
how to prepare ginger chilli garlic pickle:
once the fried chilli, ginger and garlic is cooled completely, transfer to a large bowl.
add 1 tbsp salt, prepared pickle masala and ½ cup lemon juice.
mix well making sure everything is well combined
store in an airtight container for a day and hari mirch adrak lahsun ka achar recipe is ready to serve.
Nutrition
Calories: 1597kcal | Carbohydrates: 132g | Protein: 23g | Fat: 120g | Saturated Fat: 9g | Trans Fat: 1g | Sodium: 7485mg | Potassium: 2530mg | Fiber: 19g | Sugar: 18g | Vitamin A: 6425IU | Vitamin C: 355mg | Calcium: 564mg | Iron: 13mg
how to make chilli garlic ginger pickle with step by step how to make instant pickle:
firstly, in a pan heat ½ cup oil and ¼ tsp hing.
add 100 grams ginger, 150 grams chilli and 125 grams garlic.
saute for a minute without browning.
now in a small mixi take 30 grams ginger, 50 grams garlic and 40 grams chilli.
crush to slightly coarse texture.
transfer the crushed chilli, ginger and garlic to the pan.
continue to fry until it softens slightly.
cool completely, and transfer to a large bowl allowing it to cool completely.
how to make homemade pickle masala:
in a large pan take 1 tbsp mustard, 2 tsp fennel and 2 tsp cumin.
also add 1 tsp pepper, ¼ tsp methi, ½ tbsp coriander seeds, 1 tsp pepper and ¼ tsp methi.
saute on low flame until the spices turn aromatic.
cool completely and transfer to a small mixi. also add 2 tbsp chilli powder, ½ tbsp aamchur and ½ tsp turmeric.
blend to a fine powder, homemade pickle masala is ready. keep aside.
how to prepare ginger chilli garlic pickle:
once the fried chilli, ginger and garlic is cooled completely, transfer to a large bowl.
add 1 tbsp salt, prepared pickle masala and ½ cup lemon juice.
mix well making sure everything is well-combined.
store in an airtight container for a day and hari mirch adrak lahsun ka achar recipe is ready to serve.
hari mirch adrak lahsun ka achar recipe
notes:
firstly, make sure to wipe off before chopping to prevent any moisture.
also, if you can sun dry the pickle for a day then it tastes amazing.
additionally, crushed ginger garlic and chilli will make the pickle intense.
finally, hari mirch adrak lahsun ka achar recipe stays good for a month when stored in an airtight container in the refrigerator. #Raachi #raachimasale #organic #farming #masale #spices #recipe #food #kichan #indianmasale #indianspices #Ruchi #Ruchiproducts #newruchimasale #UttarPradesh #Amethi #ecommerce #online #SHOPS


Mini idli sambar
RAACHI How to make (www.raachi.online )
mini idli sambar recipe | tiffin idli sambar recipe | bullet idli sambar recipe with detailed recipe. south indian idlis are incomplete with flavourful sambar and chutney.bullet idli sambartiffin idli sambar recipe | bullet idli sambar recipe | mini idli sambar recipe with step by step recipe. mini idli sambar or bullet idli sambar recipe is coming straight from the street vendors. tiffin idli sambar can be easily prepared in jiffy for those busy mornings. this sambar is simple, subtle yet very delicious to enjoy.
furthermore, mini idli sambar is known with several names like button idli sambar, hotel style sambar, dal sambar recipe. certainly a quick sambar recipe for your early morning tiffin that goes good with mini idli, idli, medu vada, pongal, and other south indian breakfasts. additionally, this sambar recipe is prepared very often in our house as this is my favourite sambar recipe for idli and especially button idlis.
mini idli sambar
i learned this sambar from one my aunt who is a good cook by herself. she was a bank employee and she used to get transferred to different locations within south india. hence she got the exposure to several cultures of south indian food. she learnt this bullet idli sambar recipe when she was working mysore. traditionally we prepare sambar with coconut, but in this recipe i have used only lentil.
Ingredients raachi sambar masala
1 cup toor daal
2 to matoes
½ onion
few curry leaves
1 inch ginger
few coriander leaves
2 green chillies
½ lemon
seasoning ingredients
3 tsp ghee
½ tsp mustard seeds
½ tsp cumin seeds
½ split urad dal
1 dried red chilli
pinch raachi hing powder
few curry leaves
Instructions
firstly, wash and rinse the dal and put into a pressure cooker. in the same cooker add tomatoes and raachi turmeric powder. pressure cook for 4 whistles.
once the pressure releases from the cooker, whisk the dal and tomatoes well.
meanwhile, chop onions, coriander leaves, ginger and chilli and keep them aside.
bullet idli sambar
furthermore, in a pan, add 1 tsp of oil. to the same pan add onions and fry them till golden brown.
now add curry leaves, ginger and chilli. fry for a minute.
add smashed daal to the kadai and bring to a boil.
additionally, season with salt and chilli powder.
bring it to boil. add water to maintain the consistency of sambar. boil it for 5 mins.
furthermore, garnish with coriander leaves and lemon juice, add a tsp of ghee and switch off.
prepare the tempering and add it over sambar.
finally, your tiffin sambar is ready. serve it with bullet idli's dipped in this sambar.
mini idli sambar recipe | tiffin idli sambar recipe | bullet idli sambar step by step recipe:
firstly, wash and rinse the dal and put into a pressure cooker. in the same cooker add tomatoes and turmeric powder. pressure cook for 4 whistles.
mini idli sambar
once the pressure releases from the cooker, whisk the dal and tomatoes well.
mini idli sambar
meanwhile, chop onions, coriander leaves, ginger and chilli and keep them aside.
bullet idli sambar
furthermore, in a pan, add 1 tsp of oil. to the same pan add onions and fry them till golden brown.
tiffin idli sambar
now add curry leaves, ginger and chilli. fry for a minute.
mini idli sambar
also add smashed daal to the kadai and bring to a boil.
bullet idli sambar
additionally, season with salt and chilli powder.
bullet idli sambar
bring it to boil. add water to maintain the consistency of sambar. boil it for 5 mins.
furthermore, garnish with coriander leaves and lemon juice, add a tsp of ghee and switch off.
mini idli sambar
prepare the tempering and add it over sambar.
tiffin idli sambar
finally, your tiffin sambar is ready. serve it with bullet idli’s dipped in this sambar.
mini idli sambar
notes:
firstly, idlis taste great when dipped in sambar for atleast 5 minutes.
furthermore, you can add sambar powder if you wish to make it more spicy.
moreover, mash the dal properly so that the consistency is maintained.
finally, ad a tsp of ghee to make it more flavourful.

मंगलवार, 25 अक्टूबर 2022
RAACHI How to make (www.raachi.online)
Paal Kozhukattai Recipe | Paal Kolukattai | Milk Kolukattai with detailed recipe. An authentic and traditional milk and rice flour dessert recipe is known for its creamy taste. It is basically prepared during the auspicious occasions of Vinayaka Chaturthi or Krishna Janmashtami and served as prasadam or bhog. There are many types of rice flour kolukattai prepared, but this is a creamy and rich milk-based South Indian special dessert recipe.
Paal Kozhukattai Recipe
Paal Kozhukattai Recipe | Paal Kolukattai | Milk Kolukattai with step by step recipe. South Indian dessert recipes are typically categorised as payasam or kheer recipes. These are typically prepared with coconut milk or creamy many with either lentils, rice or semolina as their base for consistency. However, there are other types of dessert recipes which are a combination of coconut milk, milk, rice flour and paal kozhukattai recipe is one such simple dessert recipe.
As I was explaining earlier, this is a unique and exciting South Indian dessert recipe. Basically, the rice flour balls or goli’s are steamed and then later cooked in coconut milk and finally with creamy cow’s milk. Thus it has all the goodness and creaminess of all the ingredients. Some regions of South India may prepare it with either coconut milk or cow’s milk. But authentically it is prepared with both. Thus making it one of the creamiest and most tasty kozhukattai dessert recipes. You may even prepare it with jaggery to have a healthier and brown-coloured dessert. But the sugar-based paal kolukattai is more attractive and tastier. Do try this variation and let me know your preference about it.
Paal KolukattaiFurthermore, some more related and additional tips, suggestions and variations to the paal kozhukattai recipe. Firstly, I have used fine textured rice flour for this recipe. Basically, it helps to get smooth and hassle-free rice balls. In an authentic recipe, rice is soaked and ground to a paste which is later shaped. However, it can be tricky so rice flour is a good option. Secondly, due to the use of rice flour, coconut milk and milk the consistency may thicken once it is rested. You may add water or milk to lower its texture and heat it before serving. Lastly, if you want to avoid sugar, you may use jaggery or brown sugar as a healthier option. In addition, you may also add khoya or mawa for a much creamier option.
Ingredients
for rice balls:
1½ cup rice flour roasted
1 tsp ghee
¼ tsp salt
1½ cup hot water
for kheer:
3 cup water
1 cup milk
¾ cup sugar
½ tsp cardamom powder
few saffron
¾ cup coconut milk thick
Instructions
firstly, in a bowl take 1½ cup of rice flour. use roasted flour or idiyappam atta.
add 1 tsp ghee, ¼ tsp salt and mix well.
now add 1½ cup hot water in batches and mix well.
mix until the flour turns moist.
cover and keep aside for 5 minutes.
knead the dough when the flour is still warm.
knead to a smooth and soft non-sticky dough.
now roll small ball-sized balls and keep them aside.
in a large kadai take 3 cup of water and get to a boil.
once the water comes to a boil, add prepared rice balls.
boil for 10 minutes or until the rice ball is cooked well.
further, add 1 cup of milk and boil until the milk thickens slightly.
also add ¾ cup sugar, ½ tsp cardamom powder, and a few saffrons.
boil for 5 minutes or until everything is well combined and flavours are absorbed.
turn off the flame and add ¾ cup coconut milk. mix gently.
finally, enjoy paal kozhukattai when it is still warm.
Nutrition
Calories: 496kcal | Carbohydrates: 90g | Protein: 6g | Fat: 13g | Saturated Fat: 10g | Polyunsaturated Fat: 0.4g | Monounsaturated Fat: 1g | Cholesterol: 11mg | Sodium: 188mg | Potassium: 234mg | Fiber: 2g | Sugar: 40g | Vitamin A: 99IU | Vitamin C: 0.5mg | Calcium: 98mg | Iron: 2mg
How to make paal kolukattai with step by step
firstly, in a bowl take 1½ cup of rice flour. use roasted flour or idiyappam atta.
add 1 tsp ghee, ¼ tsp salt and mix well.
now add 1½ cup hot water in batches and mix well.
mix until the flour turns moist.
cover and keep aside for 5 minutes.
knead the dough when the flour is still warm.
knead to a smooth and soft non-sticky dough.
now roll small ball-sized balls and keep them aside.
in a large kadai take 3 cup of water and get to a boil.
once the water comes to a boil, add prepared rice balls.
boil for 10 minutes or until the rice ball is cooked well.
further, add 1 cup of milk and boil until the milk thickens slightly.
also add ¾ cup sugar, ½ tsp cardamom powder, and a few saffrons.
boil for 5 minutes or until everything is well combined and flavours are absorbed.
turn off the flame and add ¾ cup coconut milk. mix gently.
finally, enjoy paal kozhukattai when it is still warm.
Paal Kolukattai
Notes:
firstly, the thickness of milk thickens once cooled, so adjust the consistency before serving.
also, adjust the amount of sugar to your choice to make it sweeter.
additionally, adding saffron gives a nice flavour and colour to the paal kozhukattai.
finally, paal kozhukattai recipe can also be prepared with jaggery instead of sugar.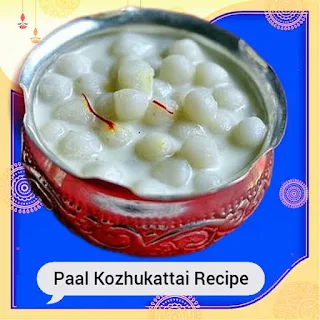

RAACHI How to make ( www.raachi.online )
Cornflakes Mixture Recipe | Cornflakes Chiwda | Makai Poha Chivda with detailed recipe. An extremely simple and tasty tea-time snack recipe prepared with corn poha or corn flakes. It is typically prepared and stored in a large container and served with evening tea or particularly prepared during the festival season. This can be an ideal munching snack or can also be served with a choice of sweets or dessert to be served with friends and family.
Cornflakes Chiwda
Cornflakes Mixture Recipe | Cornflakes Chiwda | Makai Poha Chivda with step-by-step recipe. Chiwda or sev mixture recipes are one of the popular and sought-after munching snacks. These are typically prepared with deep-fried besan sev noodles along with other condiments, thus making a lip-smacking snack. However, the same chiwda recipes can also be prepared with other ingredients and one such popular hero ingredient is corn flakes or also known as makai poha chivda.
I am a huge fan of munching snacks and I always keep a stash of it for my evening time. However, I typically prepare besan sev-based chiwda mixture, but I always look for other options. One such simple and exciting option is cornflakes chivda where crisp corn kernels are deep-fried and mixed with other mixture ingredients. This is not only easy and quick to prepare, but also a healthy alternative. Having said that, this is not the typical cornflakes used for breakfast. I have particularly got this from an Indian grocery and it is known as makai poha. Basically, it is crispier and thin in texture and expands like a pappad when deep fried. You may use breakfast-based cornflakes but you may not get the same taste and texture. Do try this snack and let me know if you liked it. Cornflakes Mixture RecipeIn addition to these, I would also like to add some more related tips, suggestions and variants to the cornflakes mixture recipe. Firstly, I have deep-fried these makai poha or corn kernels for a crisp and fast turnaround. However, you may also bake these with oil spray on them. Note that, this can take additional 30-40 minutes but is a healthy option. Secondly, in addition to the condiments I have added, you may also add fine sev noodles or even deep-fried moth beans. Typically, these are not added to cornflakes chiwda and are added to the Bombay mixture. But there is no harm in adding it. Lastly, store these in an air-tight container for longer shelf life. You may also use a large steel box with a tight lid for extra crispiness.
Cornflakes Mixture Recipe
for namkeen masala mix:
2 tsp raachi chilli powder
1 tsp raachi turmeric
1 tsp raachi chaat masala
1 tsp salt
½ tsp raachi pepper powder
2 tbsp powdered sugar
pinch raachi hing powder
for mixture:
½ cup peanuts
¼ cup roasted gram dal
¼ cup almonds
¼ cup cashew
2 tbsp raisins
½ cup dry coconut sliced
3 dried red chilli
few curry leaves
400 grams makai poha / corn flakes
Instructions
firstly to prepare the namkeen masala mix, in a bowl take 2 tsp chilli powder, 1 tsp turmeric, 1 tsp chaat masala, 1 tsp salt, ½ tsp pepper powder, 2 tbsp powdered sugar, and pinch hing.
mix well and keep the masala aside.
in hot oil, fry ½ cup of peanuts until it turns crunchy. keep aside.
also, fry ¼ cup roasted gram dal on low flame until it turns crunchy. keep aside.
further take ¼ cup almonds, ¼ cup cashew and fry them till they turn golden brown.
add 2 tbsp raisins and fry till they puff up. keep aside.
in the hot oil, fry ½ cup dry coconut till they turn golden brown and crisp.
also, fry 3 dried red chilli and a few curry leaves till they turn crisp. keep aside.
in a large bowl take, fried peanuts, roasted gram dal, dry fruits, and coconut.
add 2 tbsp prepared namkeen masala and mix well. make sure to add masala when it's still hot, or else the flavor will not absorb.
now in very hot oil add makai poha and fry until they puff up.
make sure to fry in very hot oil else the cornflakes will not puff up. drain off to remove excess oil.
transfer the fried makai poha and add remaining masala.
mix well making sure everything is well combined.
finally, enjoy Cornflakes Mixture Recipe for a month when stored in an airtight container.
Nutrition
Calories: 562kcal | Carbohydrates: 40g | Protein: 18g | Fat: 41g | Saturated Fat: 11g | Polyunsaturated Fat: 10g | Monounsaturated Fat: 18g | Trans Fat: 0.01g | Sodium: 1218mg | Potassium: 782mg | Fiber: 10g | Sugar: 11g | Vitamin A: 846IU | Vitamin C: 2mg | Calcium: 110mg | Iron: 5mg
How to make cornflakes chiwda with step by step
firstly to prepare the namkeen masala mix, in a bowl take 2 tsp chilli powder, 1 tsp turmeric, 1 tsp chaat masala, 1 tsp salt, ½ tsp pepper powder, 2 tbsp powdered sugar, and pinch hing.
mix well and keep the masala aside.
in hot oil, fry ½ cup of peanuts until it turns crunchy. keep aside.
also, fry ¼ cup roasted gram dal on low flame until it turns crunchy. keep aside.
further take ¼ cup almonds, ¼ cup cashew and fry them till they turn golden brown.
add 2 tbsp raisins and fry till they puff up. keep aside.
in the hot oil, fry ½ cup dry coconut till they turn golden brown and crisp.
also, fry 3 dried red chilli and a few curry leaves till they turn crisp. keep aside.
in a large bowl take, fried peanuts, roasted gram dal, dry fruits, and coconut.
add 2 tbsp prepared namkeen masala and mix well. make sure to add masala when it’s still hot, or else the flavor will not absorb.
now in very hot oil add makai poha and fry until they puff up.
make sure to fry in very hot oil else the cornflakes will not puff up. drain off to remove excess oil.
transfer the fried makai poha and add remaining masala.
mix well making sure everything is well combined.
finally, enjoy Cornflakes Mixture Recipe for a month when stored in an airtight container.
Cornflakes Mixture Recipe
Notes:
firstly, make sure to use fresh oil, or else the mixture will not stay good for months.
also, you can add nuts of your choice to make it interesting.
additionally, fry it on low flame to prevent it from burning.
finally, Cornflakes Mixture Recipe tastes great when the sweetness and spiciness to balanced. #Raachi #raachimasale #organic #farming #masale #spices #recipe #food #kichan #indianmasale #indianspices #Ruchi #Ruchiproducts #newruchimasale #UttarPradesh #Amethi #ecommerce #online #SHOPS

शुक्रवार, 14 अक्टूबर 2022
RAACHI MASALE
RAACHI Raachi's Premium Asafoetida or Asafoetida is of premium quality. Packed in food grade ingredients, Raachi Premium Asafoetida is safe to consume
The products at Triphal are cleaned, sorted, quality checked and packaged by trained professionals. Raachi asafoetida is suitable for use in cooking and ayurvedic medicines as well.
Asafoetida or asafoetida is an aromatic gum-resin obtained from the roots of Ferula plants. It is known for its strong and pungent aroma.
All products sold on Raachi are meticulously tested and packaged by trained professionals.
Health Facilities:
Good for Digestion: Hing helps in digestion and prevents and reduces problems like gas, bloating, constipation etc.
Relieves Asthma: Asafoetida has anti-inflammatory, antiviral and antibiotic properties, due to which it helps in relieving respiratory problems like asthma, dry cough and bronchitis.
Beneficial for reducing menstrual pain: Asafoetida is an excellent blood thinner and thus helps in smoothing the blood flow to various parts of the body. This reduces menstrual cramps.
Regulates blood pressure: Hing is considered to be a good blood thinner and thus can be helpful in controlling blood pressure
Good for skin: Enhances radiance, reduces acne, moisturizes skin and has anti-aging properties.
controls blood sugar
fights intestinal worms https://www.raachi.online/products/hing-cristal-10gm

बुधवार, 12 अक्टूबर 2022

सोमवार, 10 अक्टूबर 2022
Neem Leaf Powder
RAACHI has antibacterial properties
May help maintain oral health
Beneficial for controlling sugar level
can improve hair health
support the digestive system
increase immunity
rich source of vitamin c
Contains calcium, iron and magnesium
Original Neem Leaf Powder
Pure, natural and chemical free Known for its incomparable medicinal and healing properties, neem powder is used as a main ingredient in many home remedies. Neem is associated with the roots of Ayurveda and there are many Sanskrit names for Neem such as Nimba because Neem enhances our health. It is also called Pichumarda because it destroys skin diseases.
Raachi Organic offers you Organic Neem Powder which is pure, natural and extracted from original Neem leaves. Neem leaf powder has the highest concentration of azadirachtin which can help fight bacteria and parasites. In addition, it is a rich source of calcium, iron, fiber, magnesium, sodium, phosphorous, potassium and vitamin C.insignia
has antibacterial properties
May help maintain oral health
Beneficial for controlling sugar level
can improve hair health
support the digestive system
increase immunity
rich source of vitamin c
Contains calcium, iron and magnesium
Original Neem Leaf Powder
pure, natural and chemical
Known for its incomparable medicinal and healing properties, neem powder is used as a main ingredient in many home remedies. Neem is associated with the roots of Ayurveda and there are many Sanskrit names for Neem such as Nimba because Neem enhances our health. It is also called Pichumarda because it destroys skin diseases.
Organic Gyan provides you with Organic Neem Powder which is pure, natural and extracted from original Neem leaves. Neem leaf powder has the highest concentration of azadirachtin which can help fight bacteria and parasites. In addition, it is a rich source of calcium, iron, fiber, magnesium, sodium, phosphorous, potassium and vitamin C.
Neem Powder Health Benefits:
Neem powder is rich in antioxidants like quercetin and nimbolide which can help protect against damage caused by free radicals.
Neem powder is also rich in fatty acids like oleic, stearic, palmitic and linoleic acids which can be very beneficial for skin health.
It also strengthens immunity and keeps viral infections at bay.
It can help improve digestion.
Neem powder is also beneficial for hair related problems like dandruff, lice or hair growth.
Uses of Neem Powder:
You can use neem powder by mixing it with water and making a paste. You can apply this neem powder paste as a face mask for healthy skin care.
For overall health, take a decoction of neem powder with warm water daily.
You can also mix neem powder with honey and take that decoction twice a day before meals.Raachi Organic is not just a business venture but has a mission to promote to replace the traditional way of conditional existence to eradicate nature and live life powerfully.

मंगलवार, 4 अक्टूबर 2022
RAACHI How to make When there is something sweet to eat, then make tasty jalebi instantly, you will not forget the sweetness INGREDIENTS OF JALEBI
10 Servings
3 cup all purpose flour
1/2 cup corn flour
2 cup hung curd
1 1/2 pinch baking soda
1/2 cup ghee
2 cup sunflower oil
3 cup sugar
3 cup water
5 strand saffron
4 drops rose essence
1/2 teaspoon powdered green cardamom
1/2 teaspoon edible food color
HOW TO MAKE JALEBI
Step 1 / 3 Prepare The Jalebi Batter And Let It Ferment Overnight
To make this easy Jalebi recipe, mix together all-purpose flour, cornflour and baking soda in a bowl. Now, add ghee and food colour to the above mixture and give a mix. To make a thick batter add hung curd and water. Mix well until it is thick but has a slightly flowing consistency. Keep it aside for 8-10 hours to ferment. This step is important to give that unique "khatta" taste to Jalebi. To make the sugar syrup, heat water in a pan over medium flame. Add sugar and mix until fully dissolved. Simmer the syrup until it attains one string consistency. Add saffron, cardamom powder and rose essence. Stir well to prepare the final sugar syrup. This will be used to soak the jalebis and give them their signature sweetness.Now, heat oil in a pan over medium flame for deep frying. Fill the jalebi batter in a muslin cloth and pierce a small hole in the cloth. You can even use a squeezy bottle (ketchup bottles with a small nozzle on top) to make jalebis. Now just squeeze the muslin cloth to make concentric circles. Move from inside to outside to make perfect circles. Fry till jalebis from both the sides until they are crispy in texture and golden in colour.Soak the jalebis in sugar syrup for 3-4 minutes in warm sugar syrup. Ensure that the sugar syrup is warm and not very hot, as this will make the jalebis limp. Don't soak the jalebis for too long if you wish to retain their crispiness. Now, remove the jalebis from the syrup and place it on a tray lined with butter paper or foil. Decorate with silver foil (optional) and serve the jalebis hot, warm or at room temperature with creamy Rabri. Note: To make the jalebi even more delicious, add a little bit of ghee to the batter, this will give your jalebi that perfect aroma. To the crispy Jalebi, don't forget to ferment the batter overnight.The most important part of making Jalebi at home is to have the right consistency of your Jalebi batter. It should not be too thin or thick. Make sure your batter is of flowing co...
Traditionally, the Jalebi batter is fermented for 10-12 hours in warmth. But, if you live in a cold place, you must ferment it for 24 hours.
While frying the Jalebis, make sure the flame is on low. High heat will leave it uncooked from the inside. This will also give you ample time to give your Jalebis the best shape.
For Instant Jalebis, mix together all-purpose flour, corn flour, and a little turmeric. Then, add curd and water to it and whisk well in one direction to make a smooth batter.


शनिवार, 1 अक्टूबर 2022

गुरुवार, 29 सितंबर 2022
Achar masala pickles spices
RAACHI Add achari twist to boring food and buy raachi oraganic pickle masala online. Bring home a blend of aromatic spices and add them not only to pickles but also to salads, parathas, or use it as a side condiment with khichdi and lentils and rice. It is called methiya or sambro in Gujarat and is sprinkled on top of dhokla and other dishes. Raachi Pickle Masala is the perfect blend of the highest quality ingredients like Mustard, Fenugreek, Mustard Oil, Signature Raachi Chillies and Iodized Salt. By mixing these ingredients in the right proportion, you don't need to add any extra spices or salt to your pickles and other dishes. This is also one of the reasons why people buy raachi pickle masala online most often.
Use
Raachi Pickle Masala is the perfect recipe for homemade pickles or pickles. We have made sure to bring out the taste that reminds you of 'Maa Ke Haath' pickle. You can also use it in a variety of vegetables and salads.
How to make pickle with Raachi Pickle Masala?
Making pickles with India's most favorite and best raachi pickle masala is a child's play. It is quick, easy, convenient and tastes just like a traditional pickle.
Here is how you can make mango or lime pickle using raachi pickle masala:
Wash raw mangoes or lemons and cut them into medium sized pieces.
Make sure the mango and lime are dry.
In a pan, heat oil. Let it cool down.
Put raachi achari masala in hot oil.
Add this oil and spice mixture to the mango or lime pieces and mix gently until all the pieces are coated with the spices.
Take an airtight and dry glass jar. Add pickle to it and store.
Your pickle is ready to eat immediately.
Store the bottle in a cool place, away from moisture.
If you buy raachi pickle masala online, you can also use green chillies, carrots or other vegetables to make pickles.
Raachi Masala Recipe
Use raachi pickle masala to make pickles and quick salads. The same spice can be used to pickle raw mangoes, lime, green chillies or mixed vegetables.
Cabbage Salad
Take 1 bowl finely chopped cabbage.
Add 1 tbsp raachi pickle masala, a pinch of red chilli powder and squeeze a little lemon juice.
Mix and serve with regular Indian food.
To prepare the salad, you can use grated carrots, or coccinea (tindora, tendli).
Achari Aloo Paratha
Boil potatoes. Add 2 tbsp. raachi pickle masala, salt to taste, chopped green chillies, chopped coriander, 1 tsp garam masala and amchur powder. Mix well.
Stuff this mixture in flour and roll out the parathas. Enjoy with curd or chutney.
Other Raachi Achari Masala Recipes:
Achari Paneer Tikka
Achari Cabbage
Achari Bhindi
pickled potatoes
achari channel buy Google search RAACHI MASALE website  BLUE ROUND BUTTON CLICK

बुधवार, 28 सितंबर 2022
RAACHI Simple Salads for Summer Taste
Meal
Simple Salads for Summer Taste
Salad is one of the most versatile and nutritious additions to our meals. The freshness of vegetables refreshes our taste buds.
Following are two of our favorite salad recipes that you can use to garnish your summer time soiree and barbecue.
Fabulous Summer Slaw
Add some vibrant color and a smidge of protein and fiber with this Quinoa and Sesame Slaw.
material:
for slaw
4 cups shredded red cabbage (you can also choose other cabbage)
2 cups grated carrots
2 cups chopped green onions
2 cups cooked quinoa
cup roasted and chopped almonds
2 tbsp sesame
For the vinaigrette, combine the following in a bowl or flask:
1/3 cup sunflower oil
3 tbsp rice wine vinegar (you can also use apple cider vinegar)
1 tablespoon honey
1 tsp soy sauce
1/8 tsp sesame oil
1 pinch salt and pepper
method:
Combine the ingredients for the slaw, except almonds and sesame, and fold them together in a salad bowl.
Add vinaigrette and pour in slaw. Mix it until it mixes well.
Make it more crunchy by adding sesame seeds and roasted almonds.
Spice up your taste buds and sit back and enjoy the fresh, crunchy taste of the salad and the sweet and tangy notes of the vinaigrette.
tango with tamarind
Tamarind is sweet and tangy, a favorite of summers, which makes salads and curries even more delicious. The following recipe is not only a nutritious meal in itself but can also be served as a chaat or an afternoon snack.
material:
for salad
2 cups boiled and rinsed chickpeas (kabuli chana)
finely chopped red chili
finely chopped green chili
1 chopped red onion (small)
1 finely chopped green chili
2 tbsp sunflower oil (can be substituted with sesame oil)
tsp rachi cumin powder
tsp coriander powder
tsp raachi amchur (dry amchur)
tsp raachi red chili powder
tsp raachi fennel powder
2-3 stalks finely chopped fresh coriander leaves
salt and raachi pepper powder
For Tamarind Dressing
2 tbsp tamarind chutney (can be prepared at home using dry tamarind)
1 tbsp lemon juice.
finely chopped coriander leaves
tsp red chili flakes
tsp cumin powder
salt
Mix these ingredients together at least an hour before preparing the salad. Set them aside at room temperature to allow the flavor to circulate further.
Recipe (for salad)
Heat a pan on heat. Add oil and fennel and cook till brown. Add the rest of the dry spices and fry for 1 minute.
Add the chickpeas to the skillet and cook over medium-high heat until the chickpeas begin to crisp.
Switch off the flame and let it cool down.
Then, add the remaining vegetables and garnish the salad with a spicy tamarind dressing.

सोमवार, 26 सितंबर 2022
Yallow mastrd powder benefits

रविवार, 25 सितंबर 2022
Kale Chana Recipe
RAACHI How to make
Kala Chana Recipe | Black Chickpea Curry | Kala Channa Masala Curry with detailed recipe. An easy and simple flavoured gravy-based curry recipe prepared with black chickpeas and assorted dry spices. It is one of the popular north Indian curry recipes shared with a wide range of Indian flatbreads and particularly shared with poori & bhatura. There are myriad ways of preparing this curry, but this post describes the popular Punjabi Dhaba style channa masala gravy recipe.
Kala Chana Recipe
Kala Chana Recipe | Black Chickpea Curry | Kala Channa Masala Curry with step-by-step recipe. Indian curry recipes are versatile and with the same onion and tomato-based gravy, there could be myriad flavoured curries. The most famous vegetarian curries are typically crowded with paneer cubes due to their rich creaminess and sweet taste. However, the same gravy curry base can also be used with other types of hero ingredients and Black chickpeas are one such popular street-style curry recipe.
We all like white or kabuli chana masala gravy which is typically served with poori or bhatura. But trust me this black chickpeas gravy or desi channa is even better compared to it. It is not only tasty, but the gravy is multipurpose. In the north, it is typically prepared and served as a side dish to a wide range of bread like naan, poori and kulcha. However, in south India, the same curry base is shared with different types of breakfast recipes. My personal favourite combo is the puttu and chickpeas curry combo. Every time when I visit India, I do not forget to enjoy this from the local street vendors. Having said that, I personally prepare it for my day-to-day dinner and serve it with chapati and phulka. You may even serve these as additional sides to rice with rasam or sambar. Or perhaps serve these as curry bases with your favourite chaat recipe. Either way does try this and let me know what was your favourite choice.
Black Chickpea CurryFurthermore, some more additional tips, suggestions and variants to the Kala Chana Recipe. Firstly, this recipe is prepared only with black chickpeas and it is dedicated to just to it. Having said that, you may add other vegetables to it to make it even tastier. The best choice would be adding potatoes or even gobi which makes it a complete curry. Secondly, to improve the consistency of the gravy, I mashed a little amount of the boiled chickpeas into the gravy. This is not mandatory and I like my curry slightly thick compared to watery. Lastly, the chickpeas have to be thoroughly soaked so that it gets cooked properly. Overnight or a minimum of 6 hours soaking is a must for these chickpeas. If you have less time to soak, you may add a pinch of baking soda while it is pressure cooked for better results.
easy Kala Chana Recipe | Black Chickpea Curry | Kala Channa Masala Curry
Prep Time10 mins
Cook Time45 mins
Soaking Time6 hrs
Course: curry
Cuisine: north indian
Keyword: Kala Chana Recipe
Servings: 4 Servings
Calories: 213kcal
Ingredients
for soaking & cooking:
1 cup kala chana / black chickpea
water for soaking and cooking
½ tsp salt
for curry:
3 tbsp oil
1 bay leaf
1 inch cinnamon
1 pod black cardamom
1 star anise
4 cloves
2 pod cardamom
1 tsp cumin
2 onion finely chopped
1 tbsp ginger garlic paste
½ tsp raachi turmeric
1 tbsp raachi chilli powder
1 tsp raachi coriander powder
½ tsp raachi cumin powder
½ tsp raachi garam Masala & raachi Chana Masala
1 tsp raachi a amchur powder
pinch raachi hing powder
2 cup tomato puree
¾ tsp salt
3 tbsp coriander chopped
2 chilli
1 tsp ghee
1 tbsp raachi kasuri methi crushed
Instructions
firstly, in a large bowl take 1 cup kala chana and rinse well.
soak in enough water for atleast hours.
drain off the water and transfer the chole to the cooker.
add ½ tsp salt and 3 cup water.
cover and pressure cook for 5 whistles or until the chole is cooked well. keep aside.
in a large kadai heat 3 tbsp oil. add 1 bay leaf, 1 inch cinnamon, 1 black cardamom, 1 star anise, 4 cloves, 2 pods cardamom and 1 tsp cumin.
saute on low flame until the spices turn aromatic.
now add 2 onion, 1 tbsp ginger garlic paste and saute until the onions turns golden brown.
keeping the flame on low, add ½ tsp turmeric, 1 tbsp chilli powder, 1 tsp coriander powder, ½ tsp cumin powder, ½ tsp garam masala, 1 tsp aamchur and pinch hing.
saute on low flame until the spices turn aromatic.
now add 2 cup tomato puree, ¾ tsp salt and saute well.
saute until the oil separates from the sides.
also, add ½ cup cooked chole and mash smooth.
cook for a minute or until everything is well combined.
now add pressure-cooked chole along with water and mix well.
mix well adjusting the consistency as required.
cover and simmer for 10 mintues or until the flavours are absorbed well.
further add 3 tbsp coriander, 2 chilli, 1 tsp ghee and 1 tbsp kasuri methi. mix well.
finally, enjoy kala chana curry with roti, puri or rice.
Nutrition
Calories: 213kcal | Carbohydrates: 24g | Protein: 4g | Fat: 13g | Saturated Fat: 2g | Polyunsaturated Fat: 3g | Monounsaturated Fat: 7g | Trans Fat: 0.04g | Cholesterol: 3mg | Sodium: 807mg | Potassium: 878mg | Fiber: 6g | Sugar: 10g | Vitamin A: 1577IU | Vitamin C: 59mg | Calcium: 86mg | Iron: 5mg
How to make Kala Chana Recipe with step by step firstly, in a large bowl take 1 cup kala chana and rinse well.
soak in enough water for atleast 6 hours.
drain off the water and transfer the chole to the cooker.
add ½ tsp salt and 3 cup water.
cover and pressure cook for 5 whistles or until the chole is cooked well. keep aside.
in a large kadai heat 3 tbsp oil. add 1 bay leaf, 1 inch cinnamon, 1 black cardamom, 1 star anise, 4 cloves, 2 pods cardamom and 1 tsp cumin.
saute on low flame until the spices turn aromatic.
now add 2 onion, 1 tbsp ginger garlic paste and saute until the onions turns golden brown.
keeping the flame on low, add ½ tsp turmeric, 1 tbsp chilli powder, 1 tsp coriander powder, ½ tsp cumin powder, ½ tsp garam masala, 1 tsp aamchur and pinch hing.
saute on low flame until the spices turn aromatic.
now add 2 cup tomato puree, ¾ tsp salt and saute well.
saute until the oil separates from the sides.
also, add ½ cup cooked chole and mash smooth.
cook for a minute or until everything is well combined.
now add pressure-cooked chole along with water and mix well.
mix well adjusting the consistency as required.
cover and simmer for 10 minutes or until the flavours are absorbed well.
further add 3 tbsp coriander, 2 chilli, 1 tsp ghee and 1 tbsp kasuri methi. mix well.
finally, enjoy kala chana curry with roti, puri or rice.
Black Chickpea Curry
notes:
firstly, make sure to soak the chole well and cook until it is soft. else the curry will not thicken.
also, adding a pinch of baking soda while pressure cooking chole helps to cook chole faster.
additionally, the curry thickens once cooled. so adjust the consistency before serving.
finally, kala chana curry always tastes great when topped with ghee.

सदस्यता लें
टिप्पणियाँ (Atom)